I did it! I made some really fine kombucha at home from a beautiful healthy SCOBY given to me by a friend. It was easy once I got over the learning curve and the anxiety I felt when I received the SCOBY and screamed “what do I do with it?” I’ll tell you what I did, how easy it was and how to be a little more prepared than I was.
FIrst of all, be sure to have all the equipment you will need on hand ready for the arrival of your SCOBY. A good friend of mine gave me a SCOBY and it came much sooner than I expected so I was sort of caught out. I had to scramble around for large glass containers which are much harder to find than I expected! I also didn’t have the tea on had so I had to run out and buy some good organic green, black and white tea.
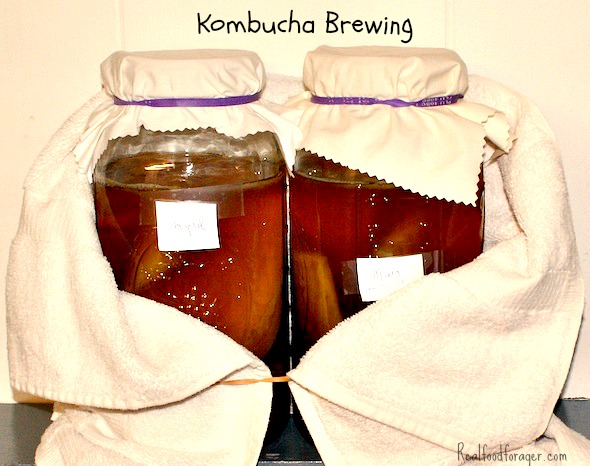
When it came time to bottle the kombucha I didn’t have the bottles on hand so I simply used quart mason jars as I wanted a strong glass jar for this.
All in all it has been a little on the edge and I was pushed into just doing it! The end product? Fantastic! I made really good kombucha and now I have all the things I need to do it again!
Basic Kombucha
Ingredients
- 1 SCOBY mother, culture or mushroom (where to buy)
- 1 gallon filtered or spring water (not tap!)
- 1 cup starter liquid the SCOBY came with
- 4 – 6 organic black, white or green tea bags or 1/4 cup loose tea (where to buy)
- 1 cup organic cane sugar (no other sweetener will work)
Equipment
- 1 – 2 gallon glass container (where to buy)
- stainless steel pot to make the tea in
- Plastic funnel (for bottling)
- Distilled white vinegar for rinsing the jars
- Clean cloth (like muslin) to cover the top of the jar with
- Rubber bands to secure the cloth to the jar
- PH strips if you want to be technical
Instructions
- Clean the jars you are using — I wound up using two 1/2 gallon jars as that is all I could get locally at the time I needed them
- Do not use soap as that will kill the SCOBY — just rinse with hot water and rinse again with white vinegar
- Of course whenever you are handling the SCOBY or jars be sure your hands are clean
- Brew the tea in a brewing vessel — I used a stainless steel pot that I thoroughly cleaned and put the tea bags into the hot water for about 5 minutes
- Remove the tea bags
- Add the sugar and stir a bit
- You can pour this tea into the glass container but be sure to let it cool before putting in the SCOBY
- When the tea is room temperature clean your hands and place the scoby into the vessel
- Pour about a cup of the starter liquid the SCOBY came in, into the vessel as well
- Cover the jar with the cloth and secure it firmly with the rubberband
- Place in a warm, quiet place out of direct sunlight and let it ferment for at least 7 days
- After 7 days start tasting it to see if it needs more time
- It loves to be at around 70 degrees F so if it is warmer it will go faster and if it is cooler it will go slower
- It will be slightly tart when it is ready
- You could also check the PH level if you happen to have PH strips handy. I did not have any when I needed them so I just tasted it. If you use PH strips it should be around 3.0
- Using a plastic straw, stick it into the liquid and taste your kombucha — if it is still sweet, let it go another day and keep checking it until you think it is ready
- The brewing time will vary for each home and each person’s taste and may differ at different times of the year
Flavoring
Here’s the fun part! Think about what flavors you would like to try and have about two tablespoons of the fruit or whatever it is ready when you are ready to bottle your kombucha.
Here are some ideas:
- Unsweetened cranberry juice
- 1 tablespoon sliced fresh ginger
- Fresh blueberries or strawberries (organic)
Bottling
- I was not prepared for this part and I did not have the cool “grolsch” style bottles on hand — actually I thought I saw them at Bed Bath and Beyond, but they didn’t have them when I shopped for them this week
- As a second choice I simply used quart mason jars with lids — plastic is best
- Remove the SCOBY — you should have another baby SCOBY from this brew — and place them into another clean 1/2 gallon or gallon jar for the next brew
- Take 1 cup of the brew as starter liquid and pour it into the new vessel with the SCOBY and place aside
- Now place you flavoring into your separate jars or bottles and pour the kombucha you made into the jars or bottles — using a plastic funnel if needed
- Leave a little room at the top of the jar or bottle
- Place the caps on the bottles or lids on the jars and leave out for 1 – 3 days
- You should check them each day for the amount of carbonation you want and to make sure they are not so pressurized that they are ready to explode — that can happen at this stage so be aware and be careful to keep these in an out of the way place
- You can place a towel around these bottles or jars for this reason
- When you think it is ready place in the refrigerator and enjoy!
Continuing the Ferment
Now you can start all over with the new jar and the SCOBY and start to make the next batch.
Depending upon how much your family drinks you may be able to keep up with your kombucha needs in this way. However, if it becomes clear that you are drinking more than you are making, you may want to consider the continuous brew system.
Stay tuned for more about Kombucha including a post about the continuous brew method!
Where to Buy Organic Kombucha and Kombucha Making Supplies
This post is shared at: My Meatless Monday, Melt in Mouth Monday, Barnyard Hop, Slightly Indulgent Tuesday, Tasteful Tuesday, Traditional Tuesday , Hearth & Soul Hop, Mommy Club, Real Food Wednesday, Gluten Free Wednesday, Whole Foods Wednesday, Healthy 2Day, Party Wave Wednesday, Seasonal Celebration, Wildcrafting Wednesday, Tasty Tradtions, Creative Juice Thursday, Full Plate Thursday, Thank Your Body Thursday, Simple Lives Thursday, Gluten Free Friday, Fight Back Friday, Foodie Friday, Fresh Bites Friday, Foodie Friday, Cultured Gathering